How to create palm table
In this tutorial you will learn how more complex scripts can be used with 3D Bits app. We will use prepared palm table script and show you how to use it in your Shopify store. This example will involve more complex logic and will offer explanation on how to combine 3D scans with parametric 3D CAD models, product variants and custom liquid UI elements.
Here is the link to demo store product of Palm Table.
Demo store password: 3d-bits-demo
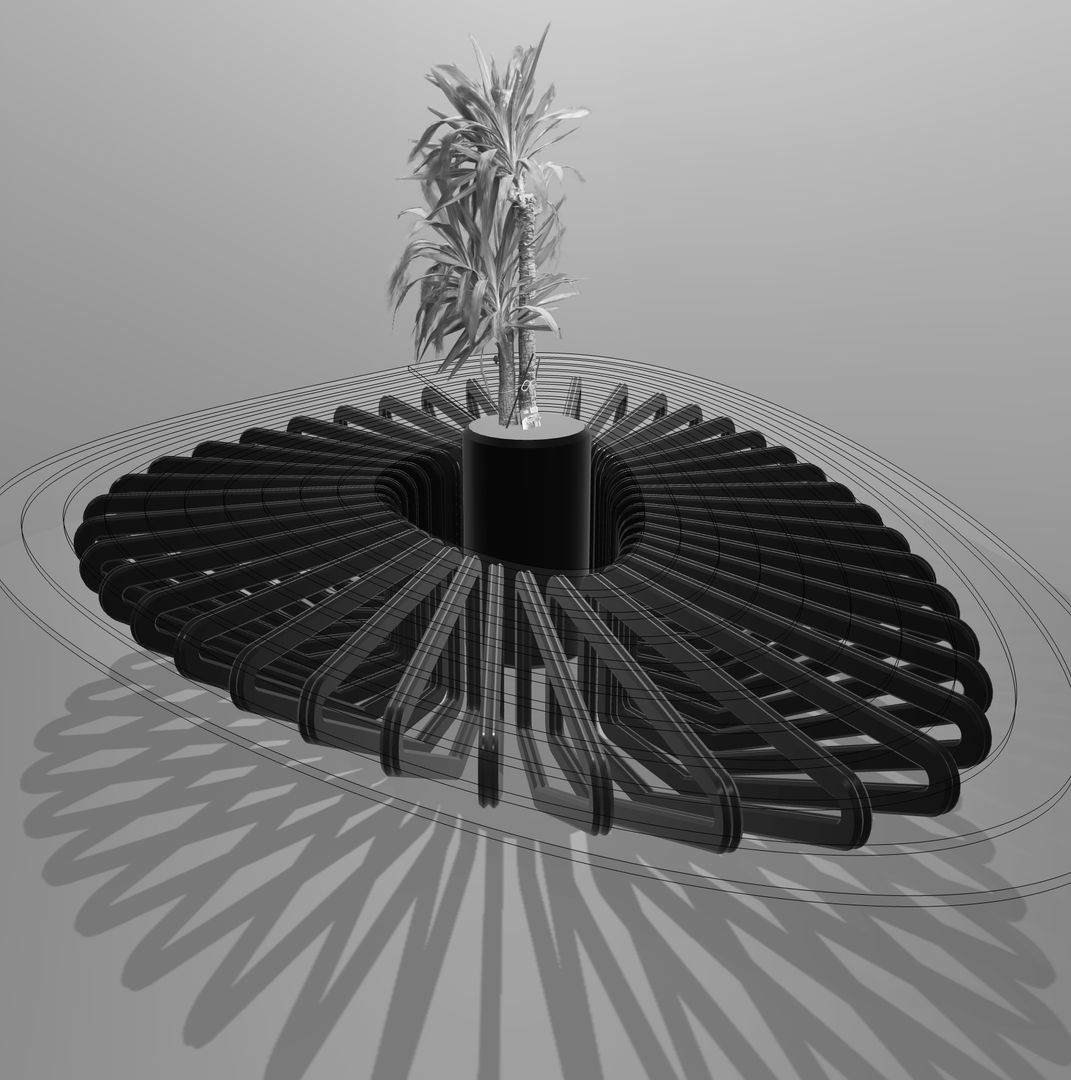
Model Example
Setting up the Product variants
Variants in Shopify let you create different versions of a product. Each variant can have its own price, SKU, barcode, and inventory quantity. You can also use variants to track different versions of the same product, such as different colors or sizes. We will use variants to create different number of legs for the table product and assign custom pricing to it.
Custom liquid UI elements
While variants are great for creating different versions of a product, sometimes you need more control over how your products are configured. This is where custom liquid UI elements come in. You can use them as line items to create sliders, dropdowns, checkboxes, and other custom elements that let customers configure products in a way that suits their needs.
Important thing to note about line items is that they can't affect the price in Shopify. If you'd like to design custom UI's for products that affect the price, you'll need to use a third party app and try to integrate 3D Bits app with it. We can not guarantee that it will work, but as long as inputs produced by those apps have name attributes, our app should be able to pick them up.
How to create custom liquid form
First we will need a new metafield. You can name it whatever you want, but the key will need to be custom.liquid-custom-line-items. Video tutorial explains how this can be done.
We will need two liquid snippets for this to work. First will define a custom liquid UI element context and apply some magic that will help us identify the product form.
This second snippet defines the form itself and is used to render the custom liquid UI element. Copy this to the product metafield that you have created.
The script on bitbybit.dev
In order to save you some time we have this embedded script that you can pick up from this tutorial page and export to bitbybit runner.
Important note on mobile devices
Some phones can find it difficult to run scripts that involve heavy geometry. iPhone memory that is available to Safari browswer for example is quite limited and if you exceed that limit, the browser will restart. You need to take that into account when preparing your scripts.