Intro to STEP
STEP files are commonly used in CAD applications. These files can represent various complex geometries. Many well known CAD applications, including Autodesk Fusion 360, Dassault Systemes SolidWorks, McNeel RhinoCeros and IMSI TurboCAD, can read and write STEP files. Through the use of OpenCascade Technology kernel we are able to interpret and manipulate STEP files as well. The process of importing these files is similar to what we already saw with glTF file format, but we will need to use some custom OCCT kernel components to parse the data before it will be drawn as BabylonJS Meshes.
As with the previous glTF tutorial, please download the provided STEP file.
Uploading the asset
In order to use the asset in the editors below, you will need to follow the steps that were outlined in the section called Uploading. Just this time make sure you will use our provided KukaRobot.stp file and name the asset KokaRobot. This will be the name that we use to access the asset in the editors.
Using Local Asset In The Rete Editor
For this step you can choose to open our Rete editor https://bitbybit.dev/app?editor=rete or just use the embedded Rete editor below.
Now we will be importing the file we've just uploaded to the browser memory into our coding environment. This will only load the file, this component does not do any interpretation as interpretation is a separate step and is generic for all files, you can use it to import images or other file types from your local browser memory. Follow this category path to get to your component:
"Asset" -> "get" -> "local file"
You will need to enter "KukaRobot" in the "file name" input of this component. Now that is done and you will need to tell BabylonJS to load this asset to 3D scene. Follow this path to get to the intended component:
"Occt" -> "Io" -> "io" -> "load step | iges"
Now connect the output of "local file" component to the input called "assetFile". Only OCCT kernel knows how to interpret Step files, that is why we need this component. This component produces a shape, that still needs drawing. This is different from Gltf, which could have been transformed to a mesh instantly by BabylonJS. We will need to use a special component to draw this shape. Follow this path to get to the draw component:
"Draw" -> "draw async" -> "draw async"
Connect the output of the "load step | iges" component to the input of "draw async" component called "entity". That's it. Now your script should work. It can take a while for robot to appear on the screen. STEP files are lighter than meshed files, but it takes longer for occt kernel to process them and transform them to meshes. Scripts below show you how complete code diagram should look like:

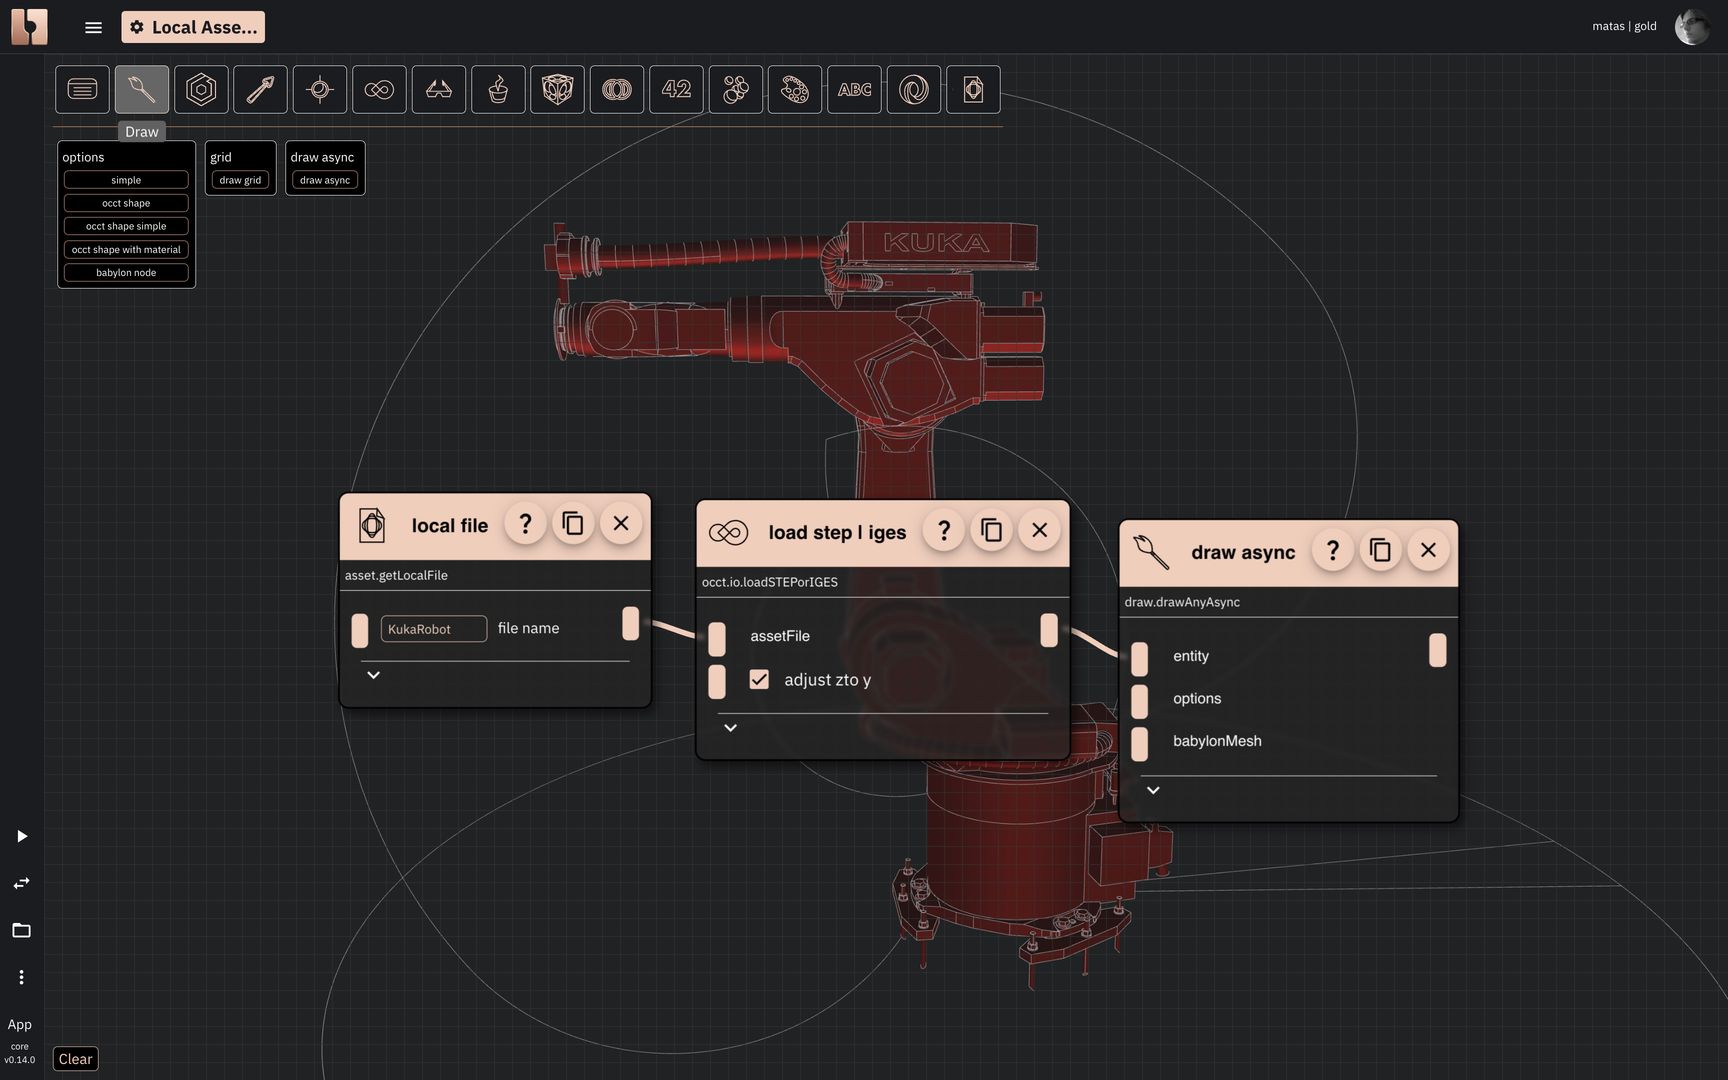
The result of imported local asset in Rete editor
Using Local Asset In The Blockly Editor
If you already uploaded the file to your browser memory, you can proceed to the next step. Your asset is available accross the editors and accross the projects. You can use it in any of your scripts.
For this step you can choose to open our Blockly editor https://bitbybit.dev/app?editor=blockly or just use the embedded Blockly editor below.
Now we will be importing the file we've just uploaded to the browser memory into our coding environment. This will only load the file, this component does not do any interpretation as interpretation is a separate step and is generic for all files, you can use it to import images or other file types from your local browser memory. Follow this category path to get to your component:
"Asset" -> "get" -> "getLocalFile"
You will need to enter "KukaRobot" in the "file name" input of this component. Now that is done and you will need to use OCCT (OpenCascade) kernel algorithm to parse STEP file into an actual shape . Follow this path to get to the intended component:
"Occt" -> "Io" -> "io" -> "loadStepOrIges"
Place "getLocalFile" component into the "loadStepOrIges" component's "asset file" input. Last thing to do is to draw the shape that will be parsed by it. Find the draw component by following this path:
"Draw" -> "draw async" -> "drawAnyAsyncNoReturn"
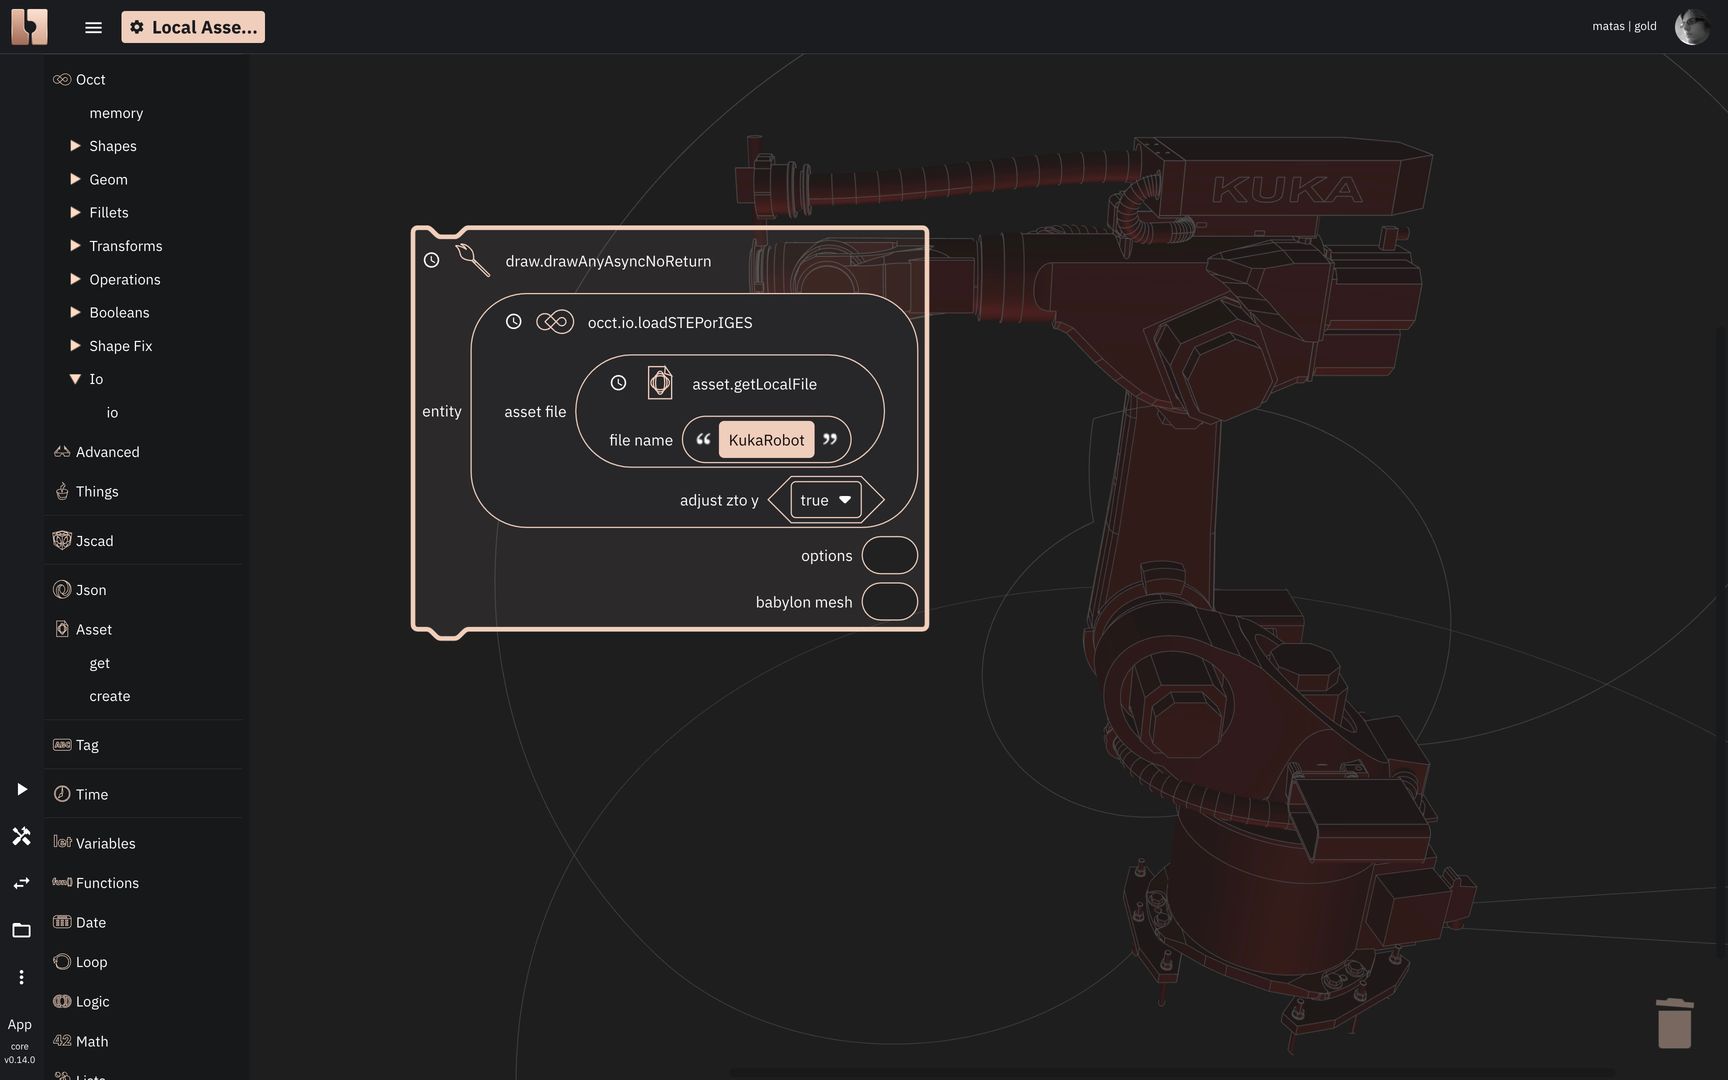
The result of imported local asset in Blockly editor
Using Local Asset In The TypeScript Editor
Open up the typescript editor https://bitbybit.dev/app?editor=typescript or just use the embedded TypeScript editor below. First you'll have to create an async start function, then load the file, parse it via occt helper function and add then call a draw command of the parsed shape. See the code below for an example of how to do that.
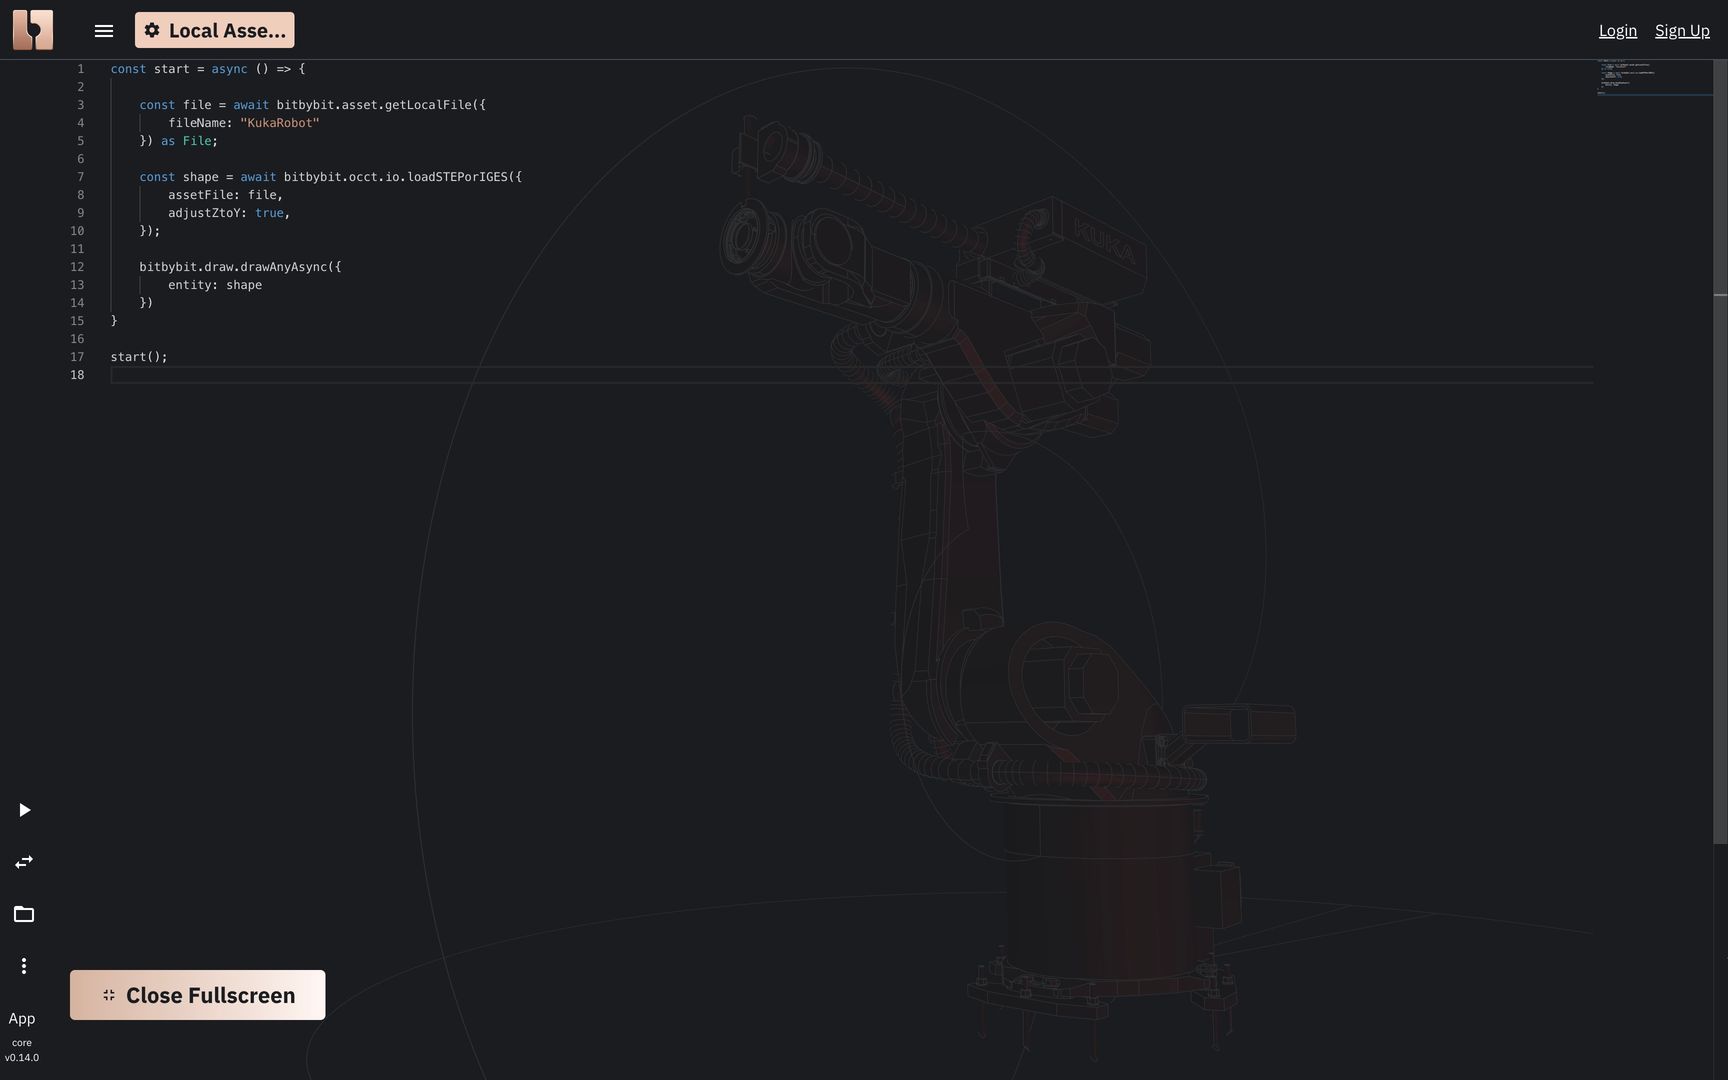
The result of imported local asset in TypeScript editor
Congrats, you have succeeded in loading the STEP file. Notice that the same strategy should work for IGES (igs) files as well.