
Intro to glTF
glTF file standard is great for creating rich, animated and textured 3D assets. Let's see how we can import this file type into our application. First of all, download this BoomBox.glb file that you will be using as a local asset. If you have your own file, you can use that as well.
Uploading the asset
In order to use the asset in the editors below, you will need to follow the steps that were outlined in the section called Uploading.
Using Local Asset In The Rete Editor
For this step you can choose to open our Rete editor https://bitbybit.dev/app?editor=rete or just use the embedded Rete editor below.
Gltf files use right handed coordinate system. To prepare our scene for this we must include a component that you can find by following this path:
"Babylom" -> "Scene" -> "system" -> "hand right"
Now we will be importing the file we've just uploaded to the browser memory into our coding environment. This will only load the file, this component does not do any interpretation as interpretation is a separate step and is generic for all files, you can use it to import images or other file types from your local browser memory. Follow this category path to get to your component:
"Asset" -> "get" -> "local file"
You will need to enter "BoomBox" in the "file name" input of this component. Now that is done and you will need to tell BabylonJS to load this asset to 3D scene. Follow this path to get to the intended component:
"Babylon" -> "Io" -> "load" -> "asset"
Now connect the output of "local file" component to the input called "assetFile"
Your result should look like the one shown in the script below. If you have experimented on this editor, you will see the intended result. Feel free to experiment with thie script below to get the desired result:
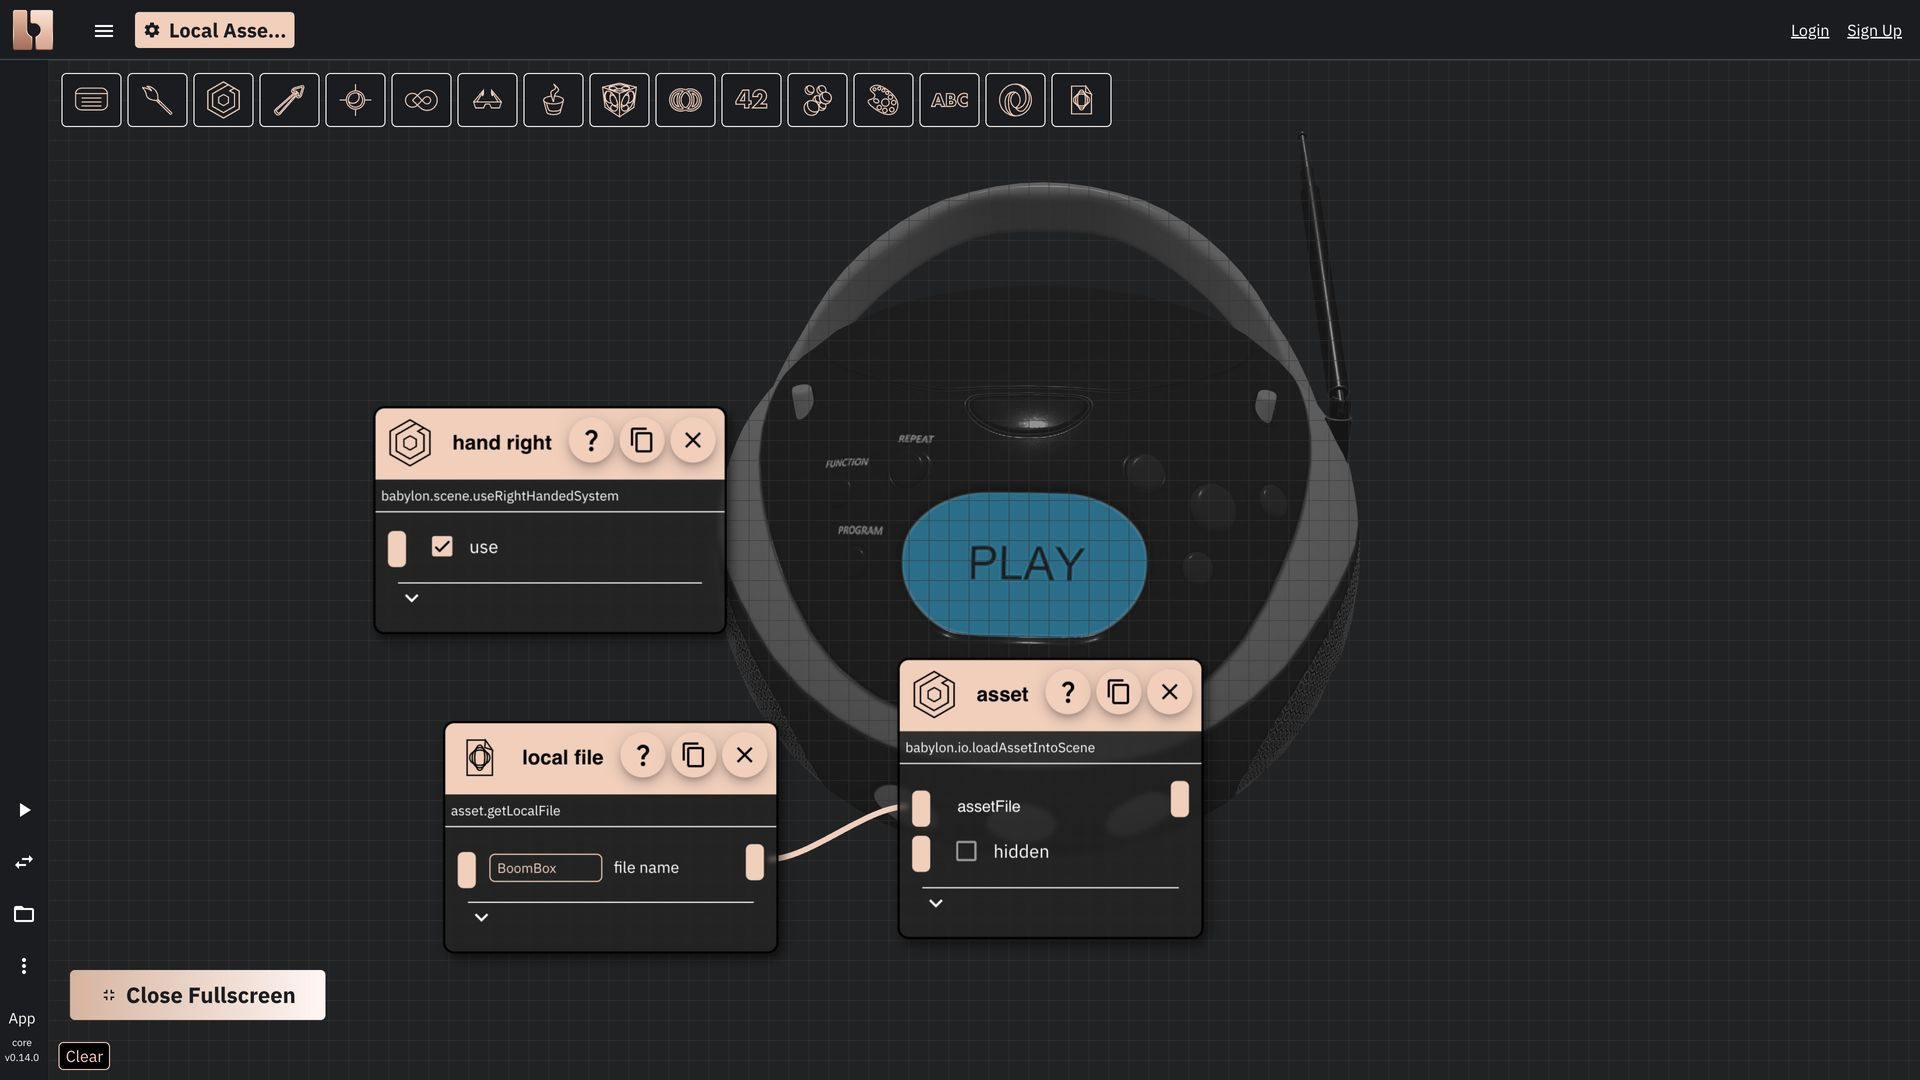
The result of imported local asset in Rete editor
Using Local Asset In The Blockly Editor
If you already uploaded the file to your browser memory, you can proceed to the next step. Your asset is available accross the editors and accross the projects. You can use it in any of your scripts.
For this step you can choose to open our Blockly editor https://bitbybit.dev/app?editor=blockly or just use the embedded Blockly editor below.
As with Rete we need to include a component that will prepare our scene for the right handed coordinate system. Follow this path to get to the intended component:
"Babylon" -> "Scene" -> "system" -> "useRightHandedSystem"
Now we will be importing the file we've just uploaded to the browser memory into our coding environment. This will only load the file, this component does not do any interpretation as interpretation is a separate step and is generic for all files, you can use it to import images or other file types from your local browser memory. Follow this category path to get to your component:
"Asset" -> "get" -> "getLocalFile"
You will need to enter "BoomBox" in the "file name" input of this component. Now that is done and you will need to tell BabylonJS to load this asset to 3D scene. Follow this path to get to the intended component:
"Babylon" -> "Io" -> "load" -> "loadAssetIntoSceneNoReturn"
Connect this component to the bottom of useRightHandedSystem component by dragging its top toward the bottom of the intended component. Now drag getLocalFile component to the input of "loadAssetIntoSceneNoReturn" component called "asset file".
After all the steps are complete you should see the result as seen in this embedded editor and the picture below.

The result of imported local asset in Blockly editor
Using Local Asset In The TypeScript Editor
First you'll have to create an async start function, then initiate the use of right handed coordinate system, load the file and add the loaded file to the 3D scene. Here is the code, which is quite self explanatory for TypeScript developers.
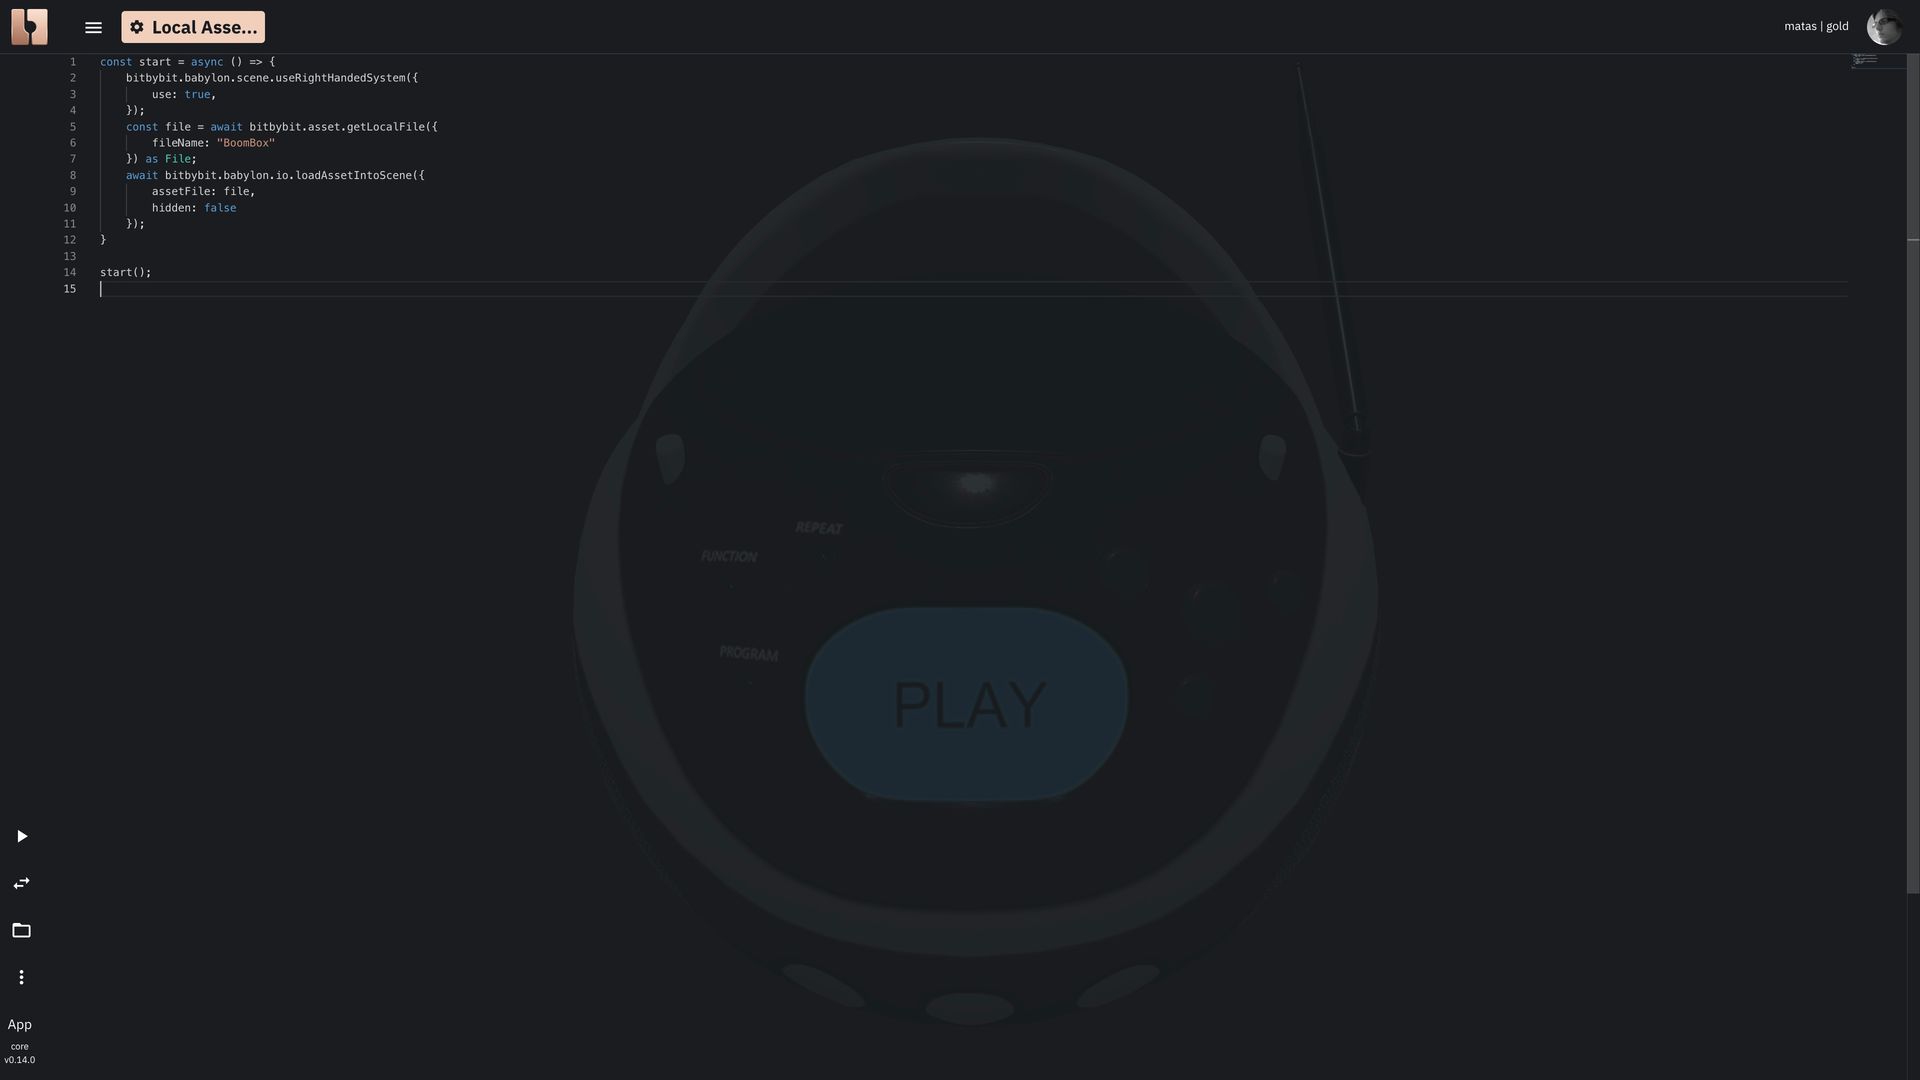
The result of imported local asset in TypeScript editor
This is it, these short scripts use our uploaded local asset, which contains geometry and quite complex materials and textures. If you would like to keep using a left handed coordinate system with glTF files, consider mirroring your models before export takes place in software like Blender or you will need to use our components to transform such models and mirror them in Bit by bit developers application.